Introduction
As promised, we are releasing the firmware and this post for the Off-By-One badge about one month after the event, allowing interested participants the opportunity to explore it. If you’re interested in learning more about the badge design process, please let us know. We were thrilled to introduce the Octopus Badge at the first-ever Off-By-One Conference 2024. The badge was a one of the highlight at the conference, as it included hardware-focused CTF challenges. In this post, we will explore the ideation and design process of the badge and discuss the concepts needed to solve the challenges.
Hardware Design
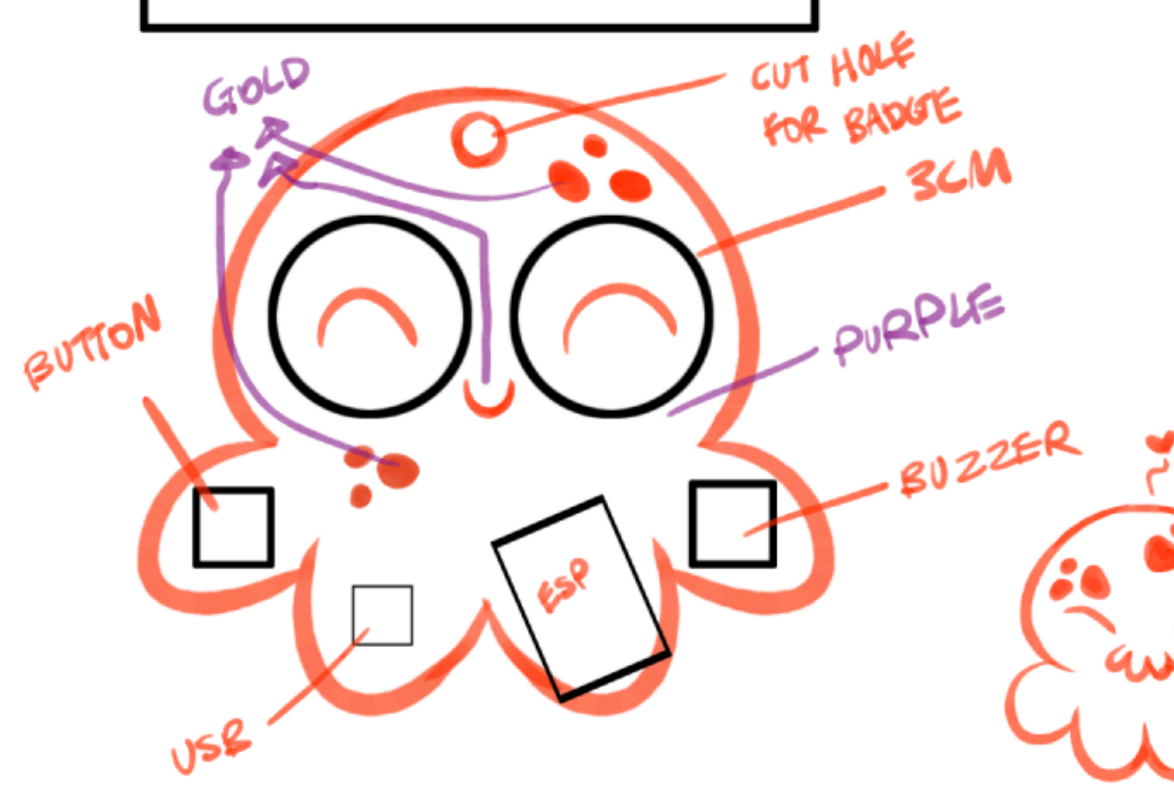
The artwork was designed by Sarah Tan and features an adorable octopus with googly eyes. After brainstorming various designs, we decided to incorporate two separate round displays for the eyes. Here is one of the sketches from the early prototypes:
Transforming the concept into a circuit design, the badge is centered around an ESP32-S3 Main Processor that drives a pair of GC9A01 OLED Displays. Users can interact with the badge using Push Buttons and a Directional Joystick. Additionally, a small coprocessor, the ATmega328P, communicates via the I2C protocol.
The electronics design was created in KiCad, and here are the 3D renders. The badge comes in three color variants to distinguish different groups of people, such as participants, crew members, and volunteers.
![]()
![]()
![]()
The original plan was to include a rechargeable LiPo battery that could last the entire length of the conference. However, due to supply chain difficulties, we opted for AAA batteries instead. Hopefully, we can incorporate the LiPo battery in next year’s badge.
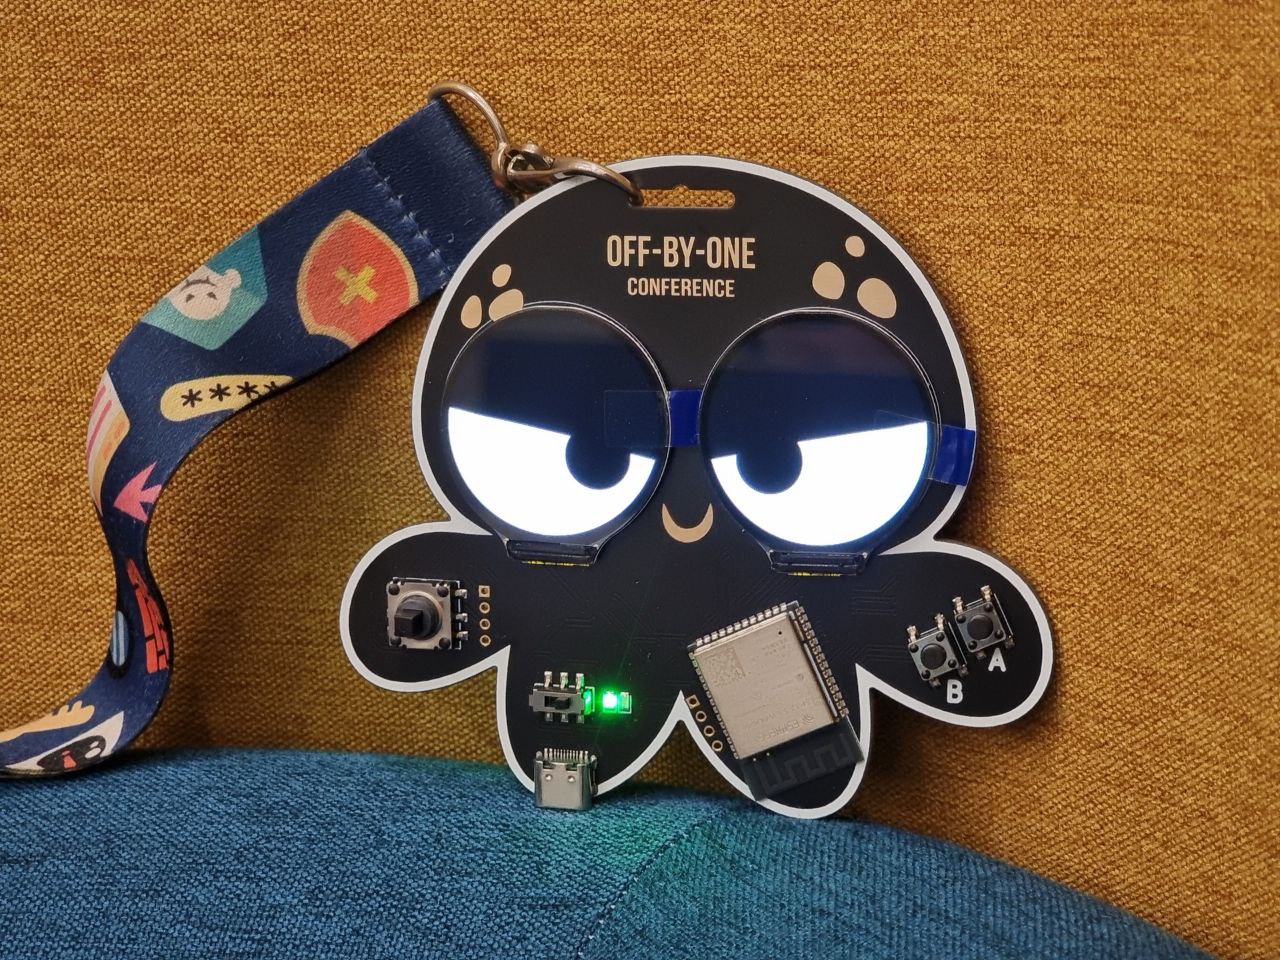
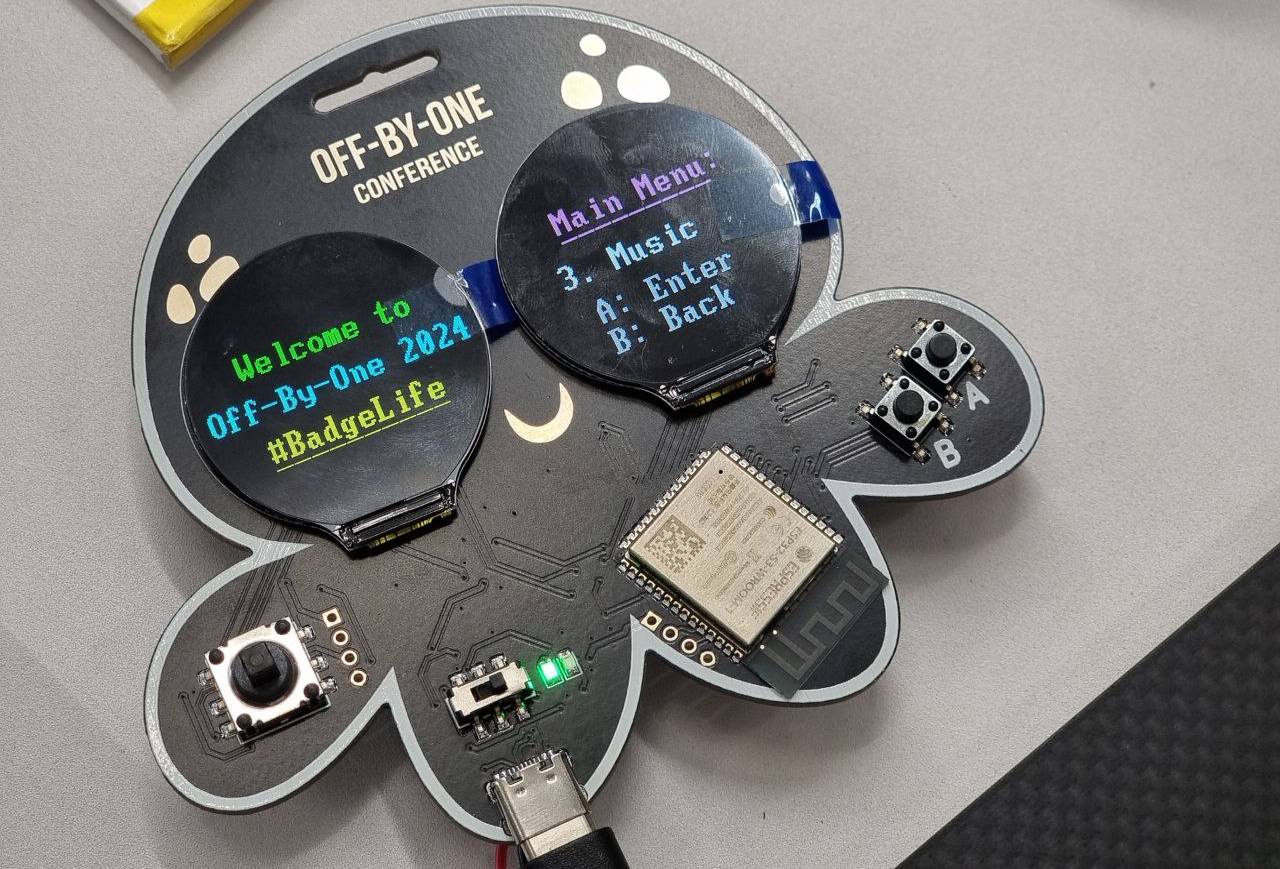
Finally, this is how the actual badge turned out to be!
![]()
Hardware CTF Challenges
Like any conference badge, ours includes CTF challenges. In this section, I will explain the inspiration behind these challenges and the intended solutions.
In particular, an embedded system is very different from full-fledged computers, in which it was originally designed for resource-constrained applications. For example, the ESP32-S3 processor has no Memory Management Unit (MMU). This means that embedded engineers write code very differently from software engineers.
Our goal is to expose participants to hardware hacking techniques, rather than just providing software challenges within a portable hardware device. We also learned how to improve our electronic badge throughout this process.
1. USB String Descriptors
The first step is to determine what kind of device it is. Therefore, the welcome flag was hidden in the USB string descriptors.
The USB descriptor will tell us where the device is from, such as the vendor and product identifiers, and also is used by your PC to determine what drivers to load.
In Linux, you may print out the kernel debugging messages using dmesg. One may also take a look at the device manager in Windows.
$ dmesg -w
  [3240249.488872] usb 3-3.2: New USB device found, idVendor=303a, idProduct=4001, bcdDevice= 1.00
  [3240249.488883] usb 3-3.2: New USB device strings: Mfr=1, Product=2, SerialNumber=3
  [3240249.488887] usb 3-3.2: Product: #BadgeLife
  [3240249.488889] usb 3-3.2: Manufacturer: STAR LABS SG
  [3240249.488892] usb 3-3.2: SerialNumber: {Welcome_To_OffByOne_2024}
Alternatively, you may also use lsusb to print out all the devices attached to the PC.
$ lsusb -vd 303a:
  iManufacturer           1 STAR LABS SG
  iProduct                2 #BadgeLife
  iSerial                 3 {Welcome_To_OffByOne_2024}
2. C-compiled internal library
The next flag is hidden in a library called flaglib. This is seen by showing all the modules through the MicroPython REPL
>>> help('modules')
[...] flaglib [...]

>>> import flaglib
>>> dir(flaglib)
['__class__', '__name__', '__dict__', 'getflag']
The naive solution is to write a script to exfilterate each character through bruteforce.
>>> flaglib.getflag("")
''
>>> flaglib.getflag("{____________________________}")
'{??_????????_??????_??????????'

>>> flaglib.getflag("{my_compiled_python_library}")
'{my_compiled_python_library}'
However, knowing that that this is a C-compiled internal library which is bundled together in the firmware, it means that its contents can be retrieved if the flash memory is dumped out. Especially so in low-cost systems where encryption is resource heavy, we may uncover passwords or keys which may be saved in plaintext by dumping out the firmware or flash memory.
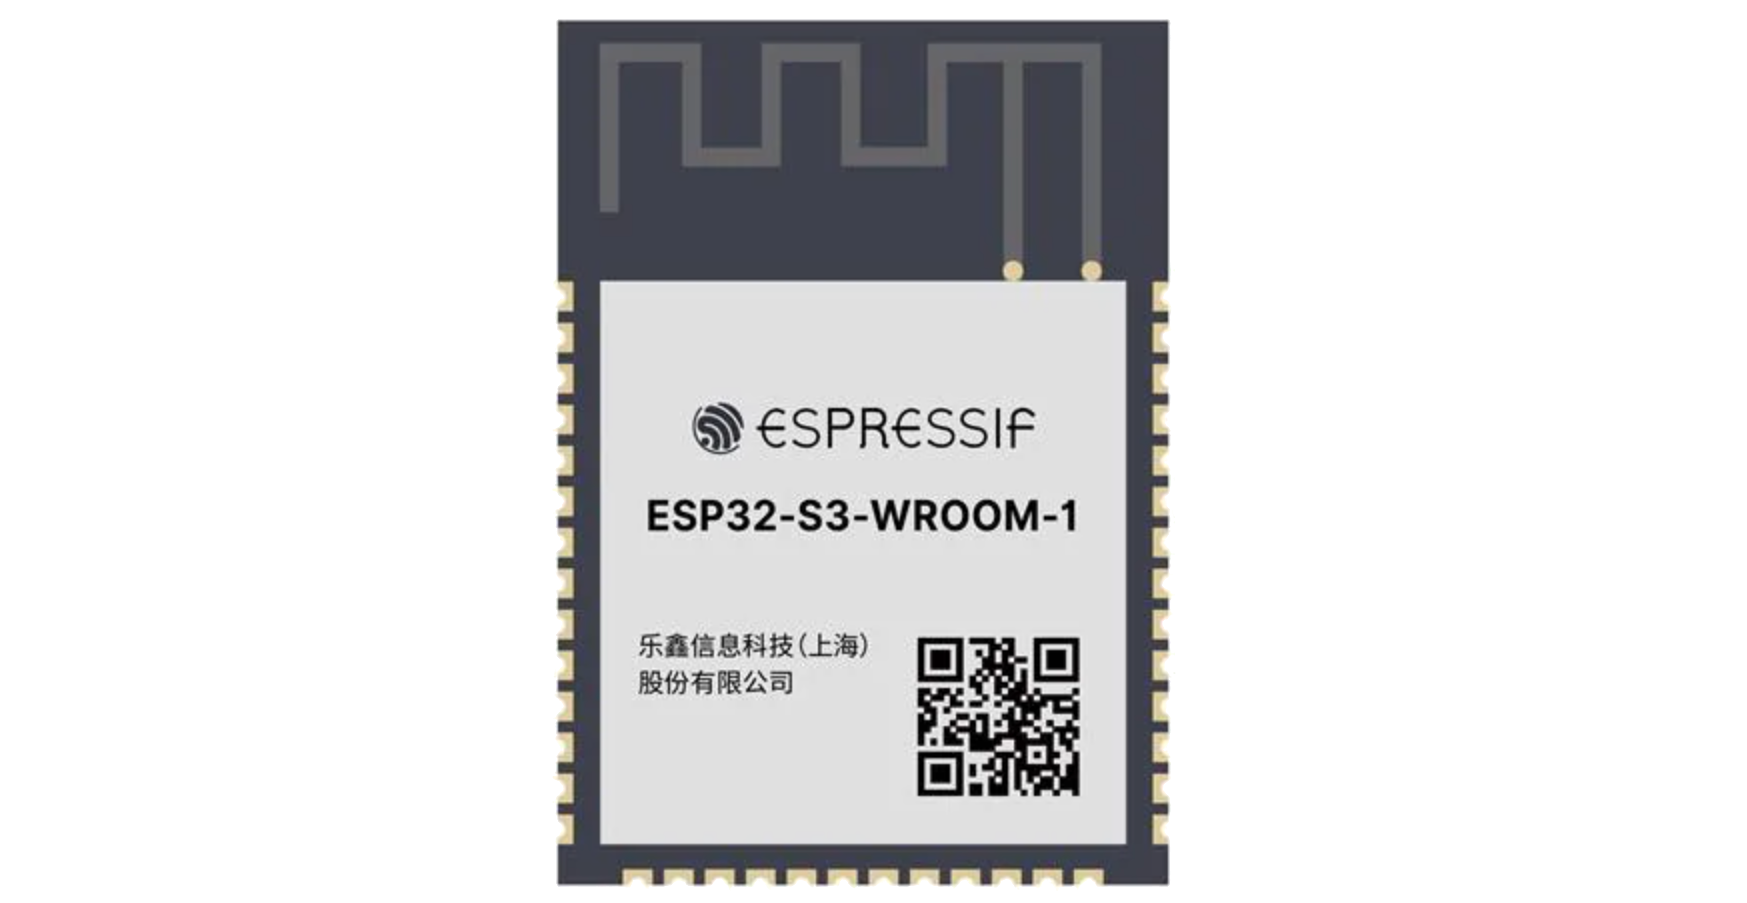
When trying to dump the firmware, first identify the type of device it is. From the label on the circuit board, we see that it is an ESP32-S3-WROOM-1-N4. We can search for the datasheet which tells us it has 4MiB of flash memory.
The firmware can be dumped from an ESP32-S3 using the esptool.py package. Put it into bootloader mode by holding down the BOOT button and pressing the RESET button. Run the following command to save the full contents into a file:
$ esptool.py --baud 115200 --port /dev/serial/by-id/usb-** read_flash 0x0 0x400000 fw-backup-4M.bin
Following which, one will typically do a simple static analysis of the dumped firmware of an IoT device.
$ strings fw-backup-4M_black.bin | strings | grep {
{my_compiled_python_library}
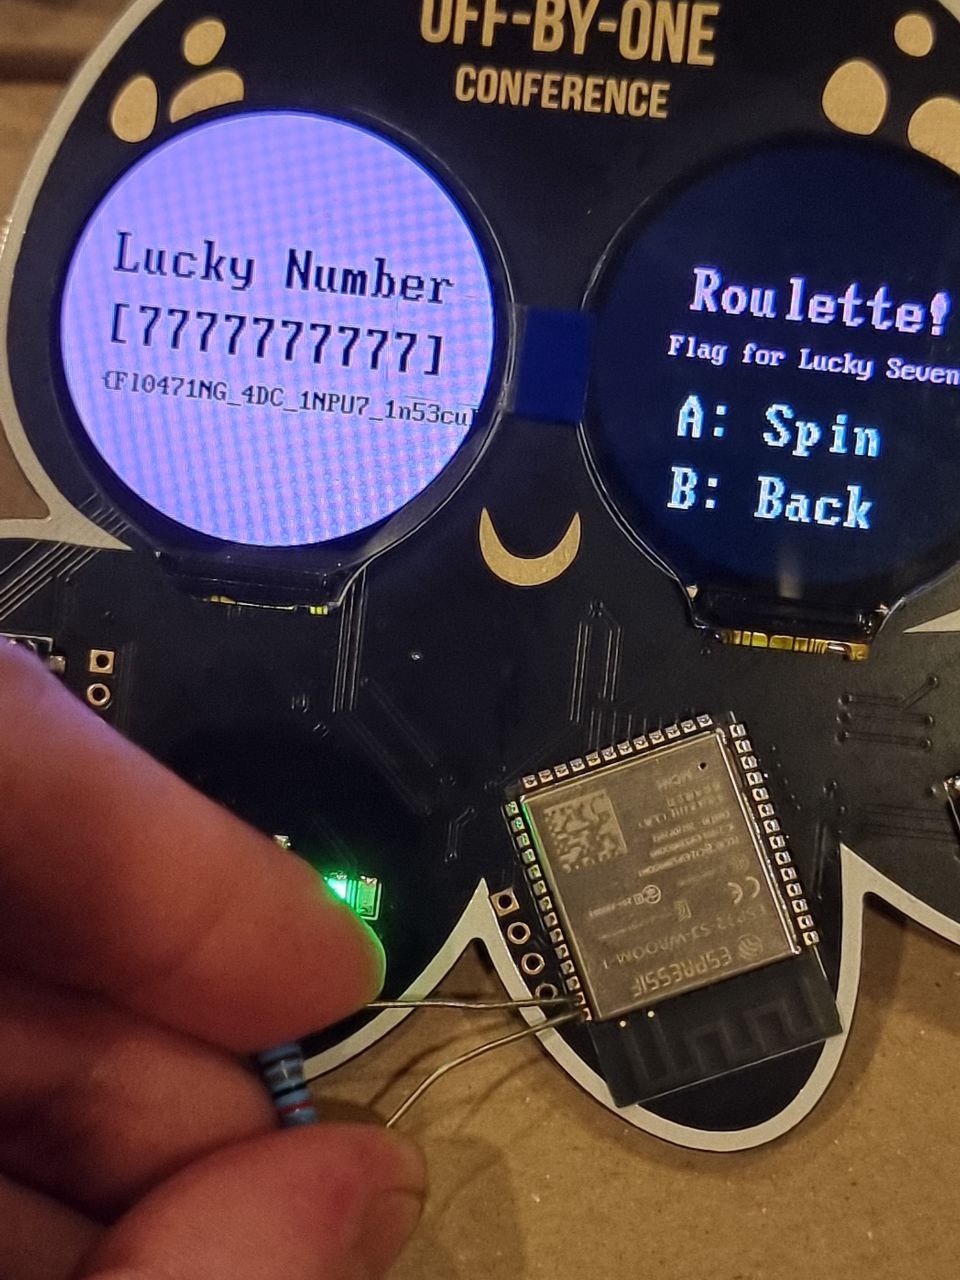
3. Hardware Random Number Generator
Through the display menu, a broken Roulette game is shown. Many people solved it by reversing the MicroPython-compiled library which can be extracted from the device as roulette.mpy. The files can be easily extracted MicroPython IDE such as Thonny or Mu Editor.
>>> from starlabs import roulette
>>> roulette.roulette()
([1, 0, 1, 2, 1, 2, 2, 1, 2, 2], None)
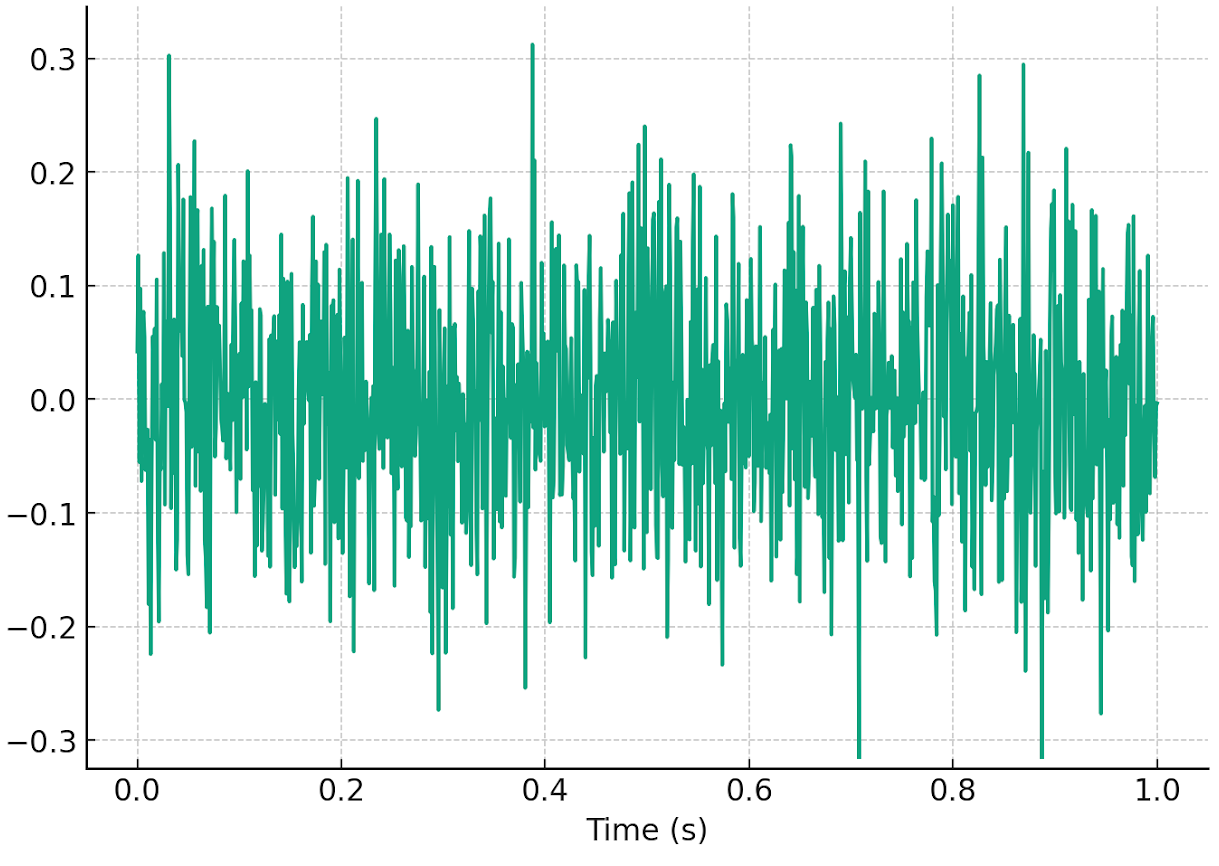
Nevertheless, our intended solution is to understand that naive-method of RNG is to use the noise generated from an analog-to-digital converter (ADC). This is particularly relevant for older microcontrollers that lack hardware RNG peripherals.
An analog-to-digital converter (ADC) is a commonly used to converts analog signals from external sensors into digital formats that the processor can use in the digital domain.
This is an example visualisation of the surrounding noise which can be used as a source to sample for random numbers.
The correct pin can be found through hardware fuzzing. Upon shorting or soldering the pin to ground, we can control the number generation and the flag will print out. This can be done by using a resistor, however, a bare wire will suffice.
4. Arduino Coprocessor
The board also has a coprocessor built using the Arduino platform.
Coprocessors are common in many IoT applications, such as having an external secure-element or processing units (such as for cryptography, certificate storage or neural networks processors). Attacks like a physical man-in-the-middle can be done if the communication protocol is not encrypted. Moving forward, replay or spoofing attacks can be done to control the behaviour of the main processor.
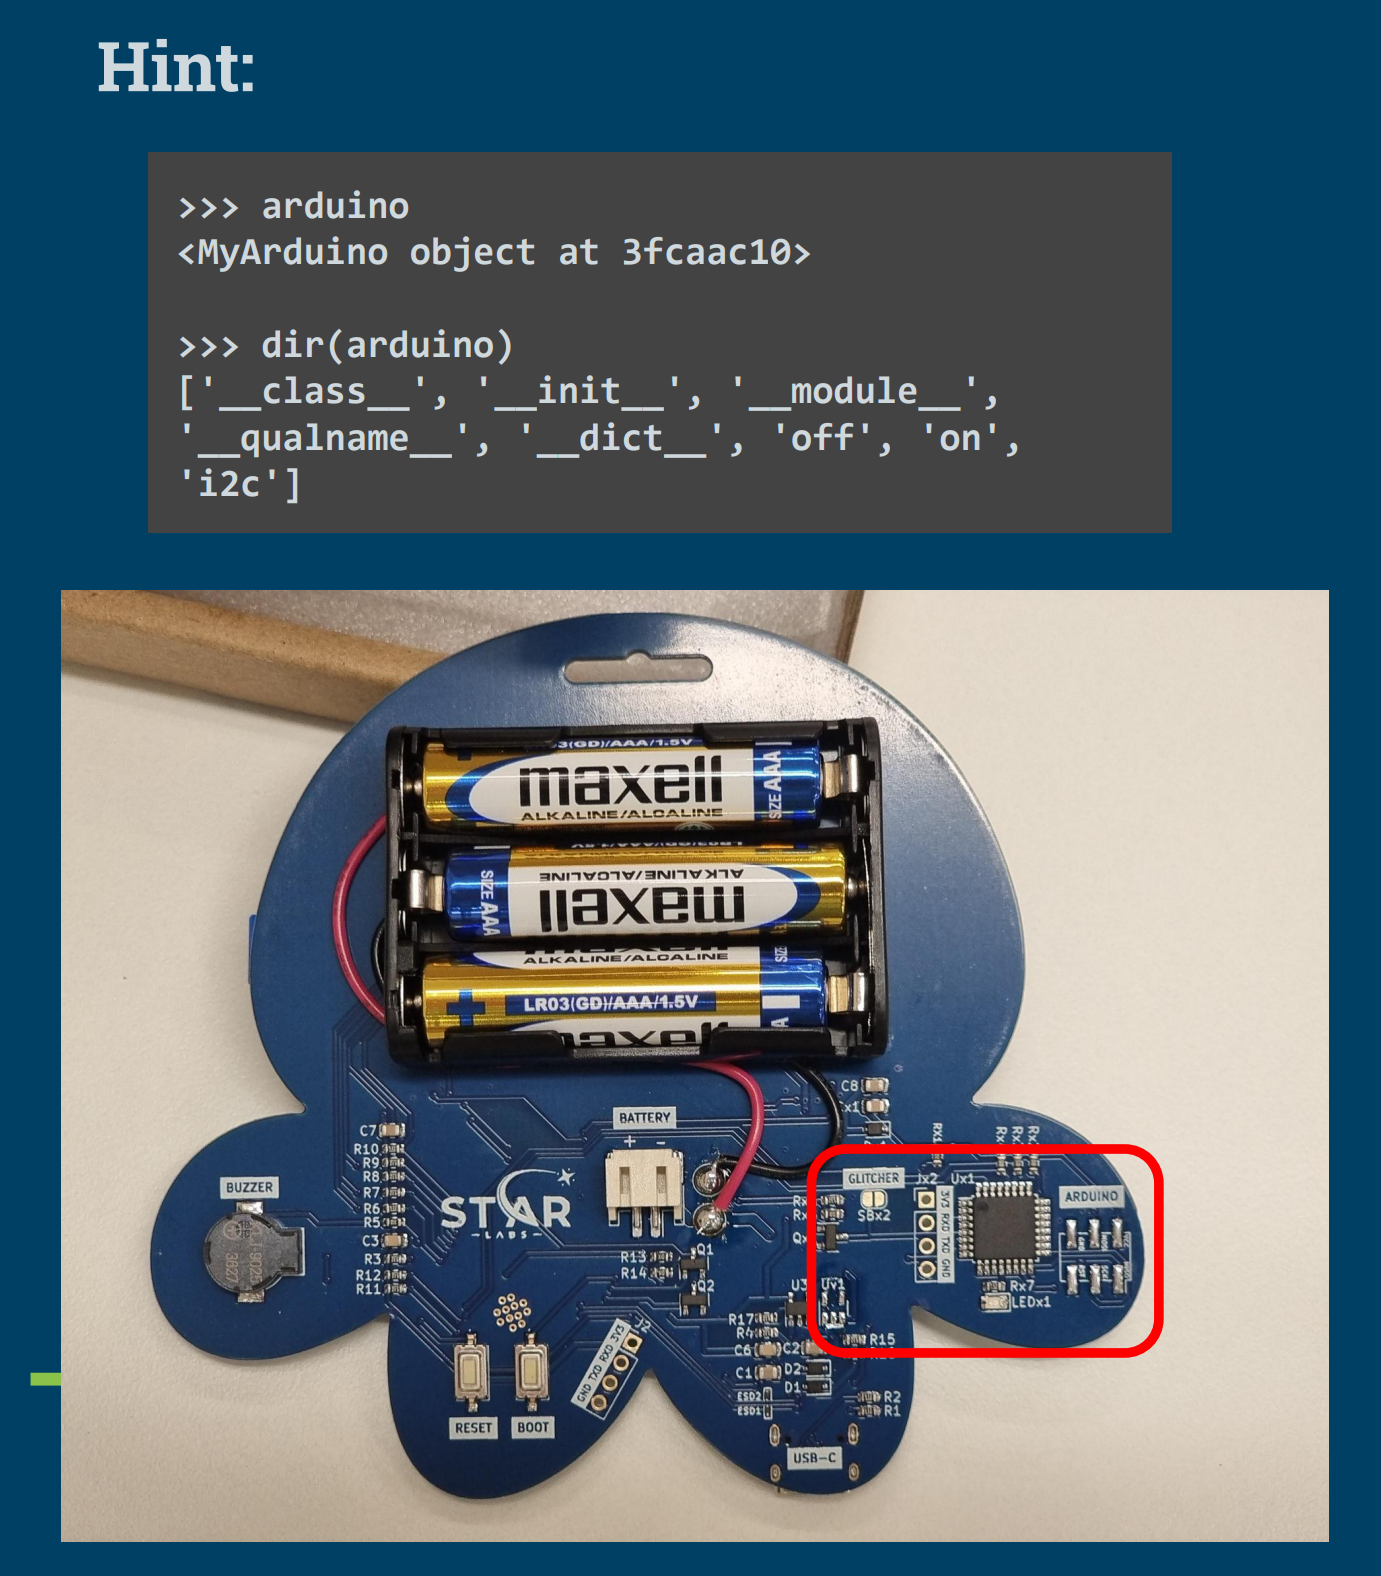
From the hint we provided in the hardware introduction guide, users can access an I2C interface to communicate with the Arduino. By scanning the I2C bus, users can discover the addresses present on the bus.
>>> arduino.i2c.scan()
[48, 49]
Inter-Integrated Circuit (I2C) is a communication protocol commonly used on PCBs between multiple devices (microcontrollers, sensors, or other external devices). Multiple devices are connected onto the I2C bus and data can be exchanged through an addressing scheme.
Here we see two I2C peripheral addresses which are 0x30 and 0x31 in hexadecimal. By performing a read request from the I2C peripheral, the flag can be found.
>>> arduino.i2c.readfrom(0x30, 100).rstrip(b'\xff')
b'Welcome to STAR LABS CTF. Your first flag is starlabs{i2c_flag_1}'
5. Timing Attack
If we perform a read request from the second address, we receive a message indicating that we should reboot and try again earlier. In other words, the challenge instructs participants to read the flag quickly based on the system uptime.
>>> arduino.i2c.readfrom(0x31, 200).rstrip(b'\xff')
b'The early bird catches the worm. System uptime: 221. You are too late. Reboot the arduino and try again.'
This presents us with a situation where certain information target device may be present in memory for a short moment during the boot sequence. We may perform a “timing attack” by resetting the MCU, waiting a known amount of time before reading from memory.
Note: Due to small timing variance (we are talking in terms of milliseconds), the process may need to be repeated until the respective chars are obtained.
This is an example implementation to solve the challenge.
def derp(x):
  global arduino
  arduino.off()
  time.sleep(1) # shutdown the arduino
  arduino.on()
  time.sleep(x); # turn on and wait a known amount of time
  return arduino.i2c.readfrom(0x31, 200).rstrip(b'\xff') # immediately read

for i in range(200, 500): print(derp(0.01*i)) # repeat in sequence
Each character of the flag is retrieved as follows:
b'The early bird catches the worm. System uptime: 197. You too early, wait a little longer!'
b'The early bird catches the worm. System uptime: 198. You too early, wait a little longer!'
b'The early bird catches the worm. System uptime: 199. You too early, wait a little longer!'
b'The early bird catches the worm. System uptime: 200. You are an early bird, here is your gift: s'
b'The early bird catches the worm. System uptime: 201. You are an early bird, here is your gift: t'
b'The early bird catches the worm. System uptime: 201. You are an early bird, here is your gift: t'
b'The early bird catches the worm. System uptime: 202. You are an early bird, here is your gift: a'
b'The early bird catches the worm. System uptime: 203. You are an early bird, here is your gift: r'
b'The early bird catches the worm. System uptime: 203. You are an early bird, here is your gift: r'
b'The early bird catches the worm. System uptime: 204. You are an early bird, here is your gift: l'
b'The early bird catches the worm. System uptime: 204. You are an early bird, here is your gift: l'
b'The early bird catches the worm. System uptime: 205. You are an early bird, here is your gift: a'
b'The early bird catches the worm. System uptime: 206. You are an early bird, here is your gift: b'
b'The early bird catches the worm. System uptime: 206. You are an early bird, here is your gift: b'
b'The early bird catches the worm. System uptime: 207. You are an early bird, here is your gift: s'
b'The early bird catches the worm. System uptime: 208. You are an early bird, here is your gift: {'
b'The early bird catches the worm. System uptime: 208. You are an early bird, here is your gift: {'
b'The early bird catches the worm. System uptime: 209. You are an early bird, here is your gift: i'
b'The early bird catches the worm. System uptime: 209. You are an early bird, here is your gift: i'
b'The early bird catches the worm. System uptime: 210. You are an early bird, here is your gift: 2'
b'The early bird catches the worm. System uptime: 211. You are an early bird, here is your gift: c'
b'The early bird catches the worm. System uptime: 211. You are an early bird, here is your gift: c'
b'The early bird catches the worm. System uptime: 212. You are an early bird, here is your gift: _'
b'The early bird catches the worm. System uptime: 212. You are an early bird, here is your gift: _'
b'The early bird catches the worm. System uptime: 213. You are an early bird, here is your gift: f'
b'The early bird catches the worm. System uptime: 214. You are an early bird, here is your gift: l'
b'The early bird catches the worm. System uptime: 214. You are an early bird, here is your gift: l'
b'The early bird catches the worm. System uptime: 215. You are an early bird, here is your gift: a'
b'The early bird catches the worm. System uptime: 216. You are an early bird, here is your gift: g'
b'The early bird catches the worm. System uptime: 216. You are an early bird, here is your gift: g'
b'The early bird catches the worm. System uptime: 217. You are an early bird, here is your gift: _'
b'The early bird catches the worm. System uptime: 217. You are an early bird, here is your gift: _'
b'The early bird catches the worm. System uptime: 218. You are an early bird, here is your gift: 3'
b'The early bird catches the worm. System uptime: 218. You are an early bird, here is your gift: 3'
b'The early bird catches the worm. System uptime: 219. You are an early bird, here is your gift: }'
b'The early bird catches the worm. System uptime: 220. You are an early bird, here is your gift: '
b'The early bird catches the worm. System uptime: 220. You are an early bird, here is your gift: '
b'The early bird catches the worm. System uptime: 221. You are too late. Reboot the arduino and try again.'
b'The early bird catches the worm. System uptime: 222. You are too late. Reboot the arduino and try again.'
6. Voltage Glitching
To access this challenge, we have to read from the UART serial port of the Arduino. Examples of USB serial adapter include CH340 Serial Adapter or FT232 Serial Adapter.
There are convenient pins broken out for us to use. This is how to attach it together

You will see this message on the newly connected serial port.
Flag is Locked! Please help me to jailbreak it.
int i = 0, k = 0;
for (i = 0; i < 123456; i++) k++;
if (k != 123456) { unlock(); } else { lock(); }
In normal operation, k == 123456 will always be fulfilled. Therefore, we can infer that the flag can be obtained only by an undefined operation. This is done by glitching past the if-statement.
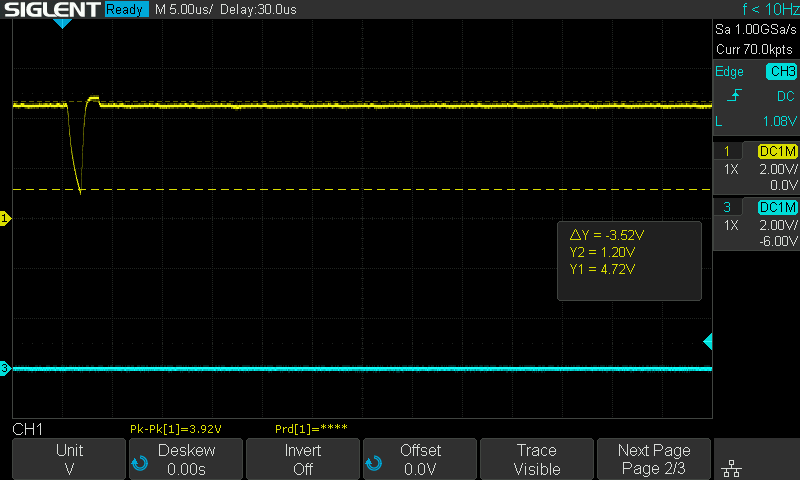
Voltage glitching involves briefly cutting the power to short moment where the processor is in an undefined state. At this moment, we quickly restore the power for it to continue its normal operation without triggering a reboot. This is repeated in hopes that a glitch occurs during that undefined state.
From the MicroPython REPL, some code has already been written for us to turn the Arduino on and off with a simple function call.
>>> arduino
<MyArduino object at 3fcaac10>
>>> arduino.off();
>>> arduino.on();
In order to perform a glitch, we quickly toggle the power. A glitch can occur when the voltage is lowered and quickly raised in succession.
>>> arduino.on(); arduino.off(); arduino.on();
We can use an oscilloscope which is a tool that allows us to view the voltage waveform in real-time. (This is not necessary to solve the challenge, however, it helps us to visualize what is going on). The image below depicts the Arduino’s voltage from the broken out pins.
Finally, we see the flag popup if we are lucky
Flag is Locked! Please help me to jailbreak it.
int i = 0, k = 0;
for (i = 0; i < 123456; i++) k++;
if (k != 123456) { unlock(); } else { lock(); }

This should not happen! k=123271
Unlocked. Here is your flag starlabs{voltage_glitching_is_cool}
Perfecting the glitch:
Due to variance in manufacturing, it may not be easily reproducible, as we see that the toggle may causes the Arduino to reboot entirely rather than glitch. This is because the power may be drained too quickly (ie. the glitch is “too strong”).
By identifying nearby components (Qx1: MOSFET), we understand that the power is toggled through a MOSFET transistor. There is also see a “Glitcher” test point which connects across the MOSFET transistor. We can make the glitch more reproducible by soldering either a capacitor or resistor across the MOSFET transistor.
Conclusion
Thank you to everyone who participated in the conference and took on the CTF challenges! The badge design successfully fostered a deeper understanding of embedded systems and the skills required to tackle hardware devices. We hope the badge sparks further interest and provides a valuable platform for exploration and learning long after the conference has ended.